Table of Contents
Today I fixed my lawnmower wheels which seem to have gotten rather wobbly in the 5 years we have owned our mower. I'll explain how I did this shortly, but please do be sure to read the next paragraph.
Important note: if you have a question to ask, please ask it at Lawn Mower Forum, either in the Black & Decker area or the Electric & Battery Operated area at that website. I apologize for being unable to handle individual requests for help posted on this blog or sent by email.
The first thing you should know before reading this is that the lawnmower wheels probably should be a little wobbly and not perfectly rigid. To make them perfectly rigid means having things so tight that they will not turn easily and freely. It looks like it would be pretty difficult to loosen wheels that have been overtightened, so be careful if you try this procedure not to pound too much with the hammer.
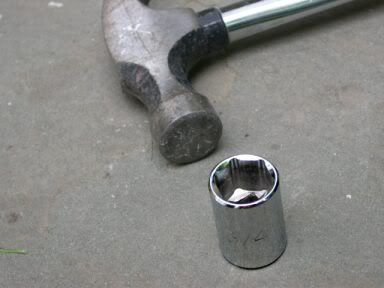
For tools you'll need (1) a hammer and (2) a 3/4" or 19 mm socket from a socket wrench set.
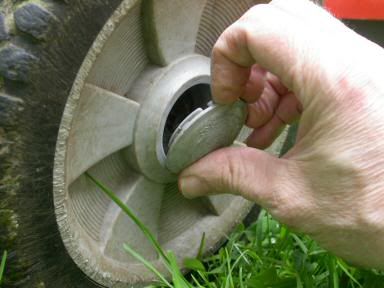
After removing the safety key, insuring that the mower will not start accidentally, you'll need to pop off the plastic hub caps from the wheels. This can be done with your fingernails, though it may be easier to use a flat blade screwdriver or knife blade.
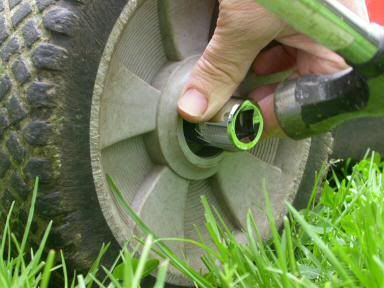
Next, hold the socket against the wheel -- hex side in toward the axle, square side facing out. Tap the square socket with the hammer, easily at first. Check for movement of the push ring (the thing that resembles a washer) by wiggling the wheel from side to side after every couple of hits, and gradually increase the hammer force until it is enough to move the push ring inwards towards the wheel. Do not pound the push ring so far that it is pushed tight against the wheel! You need to leave some clearance so that the wheel still turns freely. The idea here is to reduce the wobble, not to eliminate it entirely.
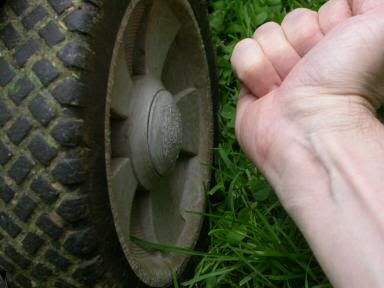
After adjusting the push ring, replace the hub cap by pounding it with your fist until you hear it snap back into place and you're good to go.
A final note about this procedure. You will notice that the washerlike push ring has two parts, (1) an outer flat part and (2) an inner slanted, cone-shaped part. The force from the hammer blows should push on the flat face, not on the slanted part. That's why the 3/4" socket is the right size for doing this, as it pushes completely outside of the slanted faces. A 1/2" socket, which would just slip over the 1/2" axle, would push on the slanted faces of the push ring. I did try it this way at first, but found that the push ring would not budge.